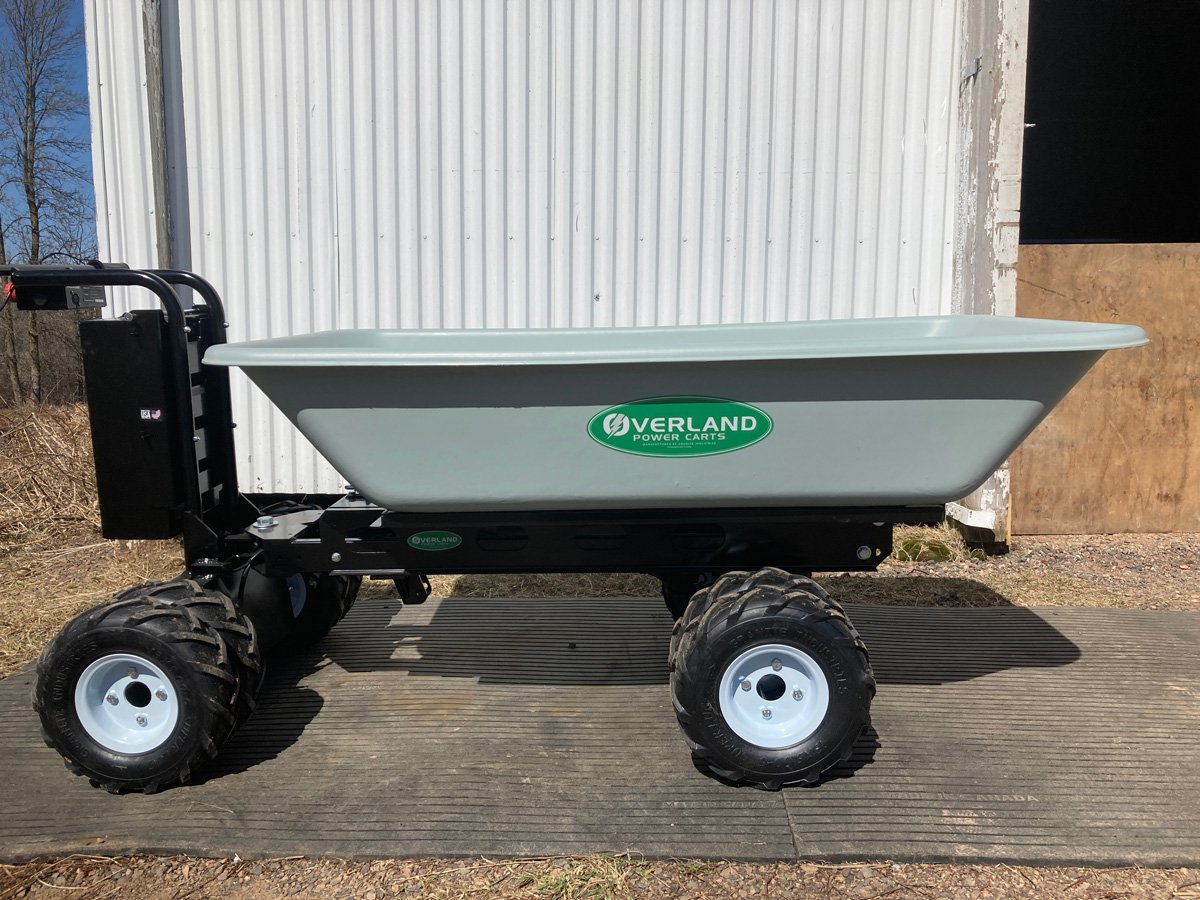
2022 Overland Electric Power Cart
When ordered in October of 2022, I was unaware of relocation plans. First used in April of 2023, it’s been a good fit for my landscaping projects. More hauling capacity and easier hauling than a wheelbarrow, yet far less expensive to own and operate than my Bobcat MT85, it fills a gap and has increased my productivity.
The fiberglass box has a whopping 9 cubic foot capacity! For light weight cargo, the massive space is great. For heavier cargo like landscape rock or dirt, you have to scale back to extend your charge life. At about 50% loaded with stone, it will make multiple trips up minimal slopes and remind you how much easier it is than pushing a wheelbarrow.
When purchased, I bought both the fiberglass box and the flatbed with different intentions for each unit. Since my landscaping plans were shortened by relocation, the flatbed has never been used. Both boxes come with the power cart and exchange with a single pin.

Like the fiberglass box, the flatbed also tilts. Beyond tilting, the flatbed can be mounted with the flat side up or with the lip side up depending on your preference. The flatbed gives you the option to specialize the flatbed to best fit your personal or business needs.

By moving 2 levers, one for the front wheels and one for the rear, you can roll the cart wherever you want it to go. Brakes? Not an issue! The power cart is equipped with auto brakes. When you release the throttle, the cart stops. Up hill, down hill, doesn’t matter. Release the throttle and it will stop within a couple feet and hold that position until you turn the throttle.

With plans to use my power cart for hauling pavers, bullet edgers, and the like for landscaping, I built this wooden box that fits nicely on top of the flatbed. With a removable gate on one wide side, it will hold close to 700# of pavers or bullet edgers.
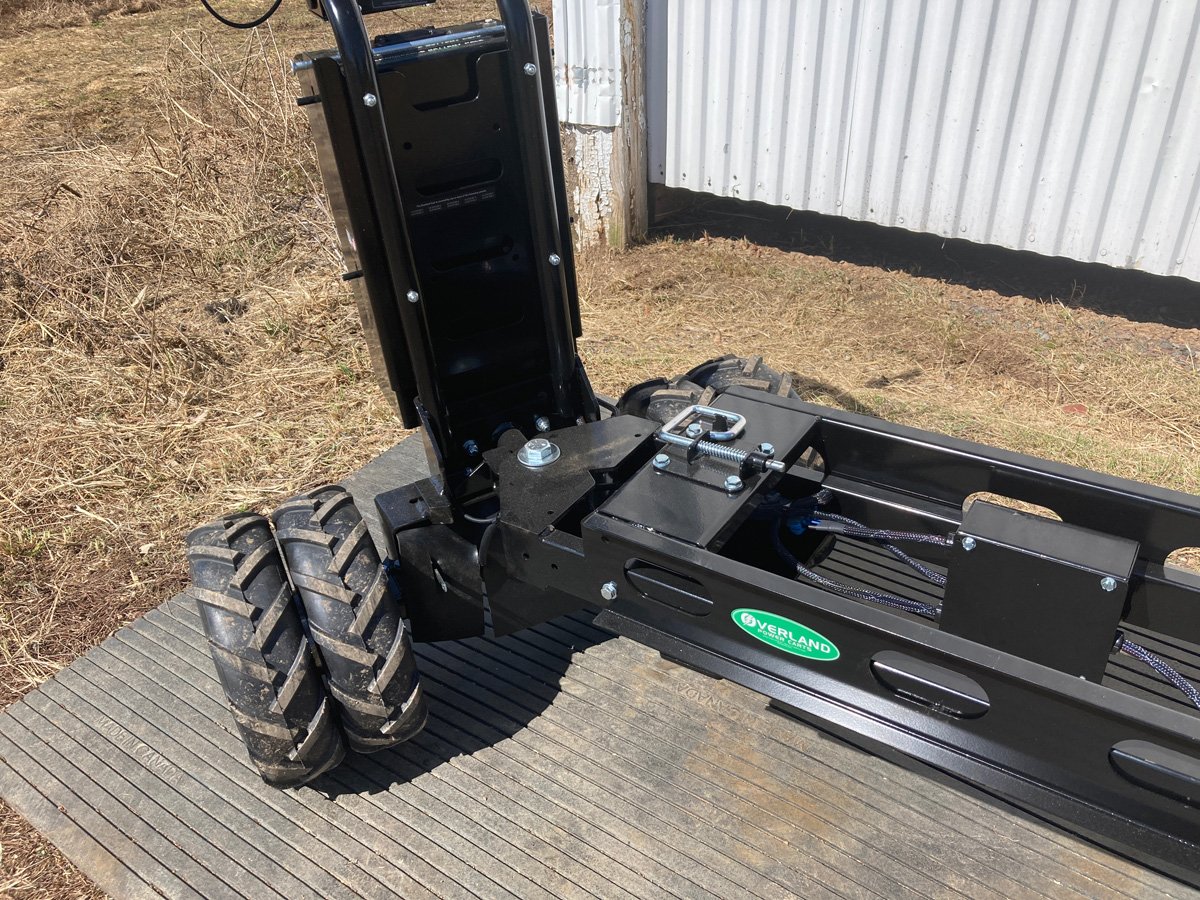
Rear axle steering with 4-wheel drive and eight 13” ag tires on the ground, you are in control. Without leaving lug tracks, you can trek across lawns multiple times without leaving a lasting mark.

Battery life varies with terrain and the amount of weight hauled. Power cart specs indicate an 8 hour battery life per charge. I never tested it. When I wasn’t using it, I simply pulled it into the portable charger so I knew it was ready when I needed it.

Operating is simple. Pull out the red button to power on the cart. Flip the switch to the left for forward or backward. Turn the throttle handle to the right of the full-empty charge signal and the power cart will start out slow and rev up to whatever speed you choose based on how far you twist the throttle handle. Maximum speed is a brisk walk - 4 mph.
Since I was not aware of any dealers who sold them, I did my homework, talked to multiple people at Granite Industries, and read all the information I could find. Having used it lightly during the season (other than scratches in the fiberglass box, it’s like new), it has performed well for my needs realizing I was pushing the limits on weight and battery life since I had so much space at my disposable. Would I like more battery life? Of course! Then I could pile it full of dirt and get more work done! But everything has its limits and I learned to use my power cart within those reasonable limits. If I were hauling bulky light loads, sure, I would have piled it on. But like I said, it filled a void and has been a great asset to my small landscaping business. Since most want to know, this Power Cart with both flatbed and fiberglass box (without the wooden box) costs $4,690 when I checked recently - provided they still offer free shipping. Save yourself $1,090, get the extra wooden box, and own it today, not several weeks after you place your order. (I waited 8 weeks for my Power Cart). It’s an investment, but it’s a productivity investment.
$3,600

Core Cut 10” Paver Wet Saw
Core-Cut, one of the premier brands of paver wet saws a few years ago, put out some very good saws. With little maintenance, this saw does what one needs it to do. It cuts pavers and wall block caps up to 4” thick. Most commonly, I used it to cut standard thickness pavers.
This paver saw has spent far more time sitting in the shed than it has on the job. Being a small landscaping business and the only employee, I used it on one patio in 2021; in 2022, I used it on 2 small patios; in 2023, 2 patios. If it had an hour meter, it would show very low hours.
The Core-Cut is simple to use. All you need is about 5 gallons of water for the tray below where the pump sets and electricity to power the 1.5 hp motor. As long as those 2 component are in place, the pump, via the water lines, will keep the blade wet - and wash off your chalk marks! The motor for the paver saw has, as part of the reconditioning, both a new start and run capacitor.

Primarily from lack of use, I reconditioned the paver saw during the last 2 seasons by replacing all the water lines, installing a new water pump ($100), and recently put on a new ($120) blade. As mentioned previously, the motor itself also has a new start capacitor and run capacitor leaving it ready to work for you.
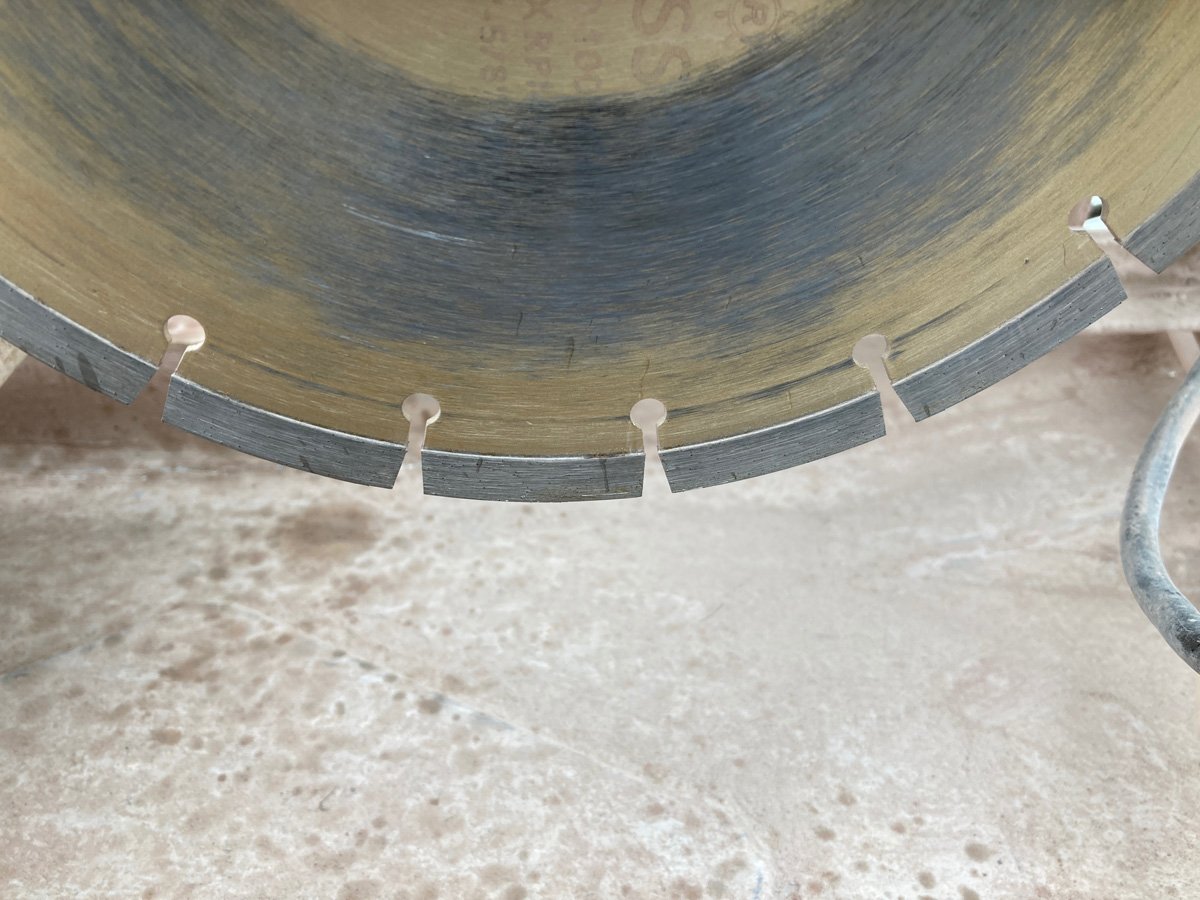
This Core-Cut is very portable. When you move it to the job, find a relatively level spot. Fold out the legs. Lift the paver saw and set it on the legs so that the 2 pins on each end are inside the paver saw frame. Add water and power. Let the cutting begin! With a new blade like this one, you’ll be cutting for a long time before you need to replace it.

With the reconditioning work done for you, this paver saw should function very well for years to come. It might not look like new, but, if it does what you need done, looks are in the finished product, not the dusty paver saw.
When I search the internet for Core-Cut paver saws, I typically find other brands. I don’t know for a fact, but I suspect Core-Cut saws have been bought out by another manufacturer. Even so, this paver saw does what wet saws need to do and it does it very well. The typical wear parts, if you want to call them that, have been tended to so that this saw is ready for work. Although I haven’t used it extensively, it has always done a great job of cutting pavers. With a sliding tray to move the pavers into the stationary blade, you control the cutting speed. With practice, you learn the speed and how to cut all sorts of different paver shapes and sizes.
$600

Speedi-Cut SC7314 14” Chop Saw
As is obvious, the Speedi-Cut is not a Stihl, but having used it nearly as much as my Stihl, Speedi-Cut knows how to cut. With a similar 14” diamond blade, you can expect it to perform well.
With a trigger lock combination, much like you see on chain saws, it starts and runs great. Tip it on its side to add your mixed gas and you’re ready for work! The current blade has about 10% life in it, but if you’re only using it occasionally for a few blocks, a 10% diamond blade lasts a long time.
Although not as popular as the Stihl, the SC7314 still gets the job done. When I need a chop saw to cut things that are out of the ordinary, I reach for my Speedi-Cut. Wood, PVC pipe, dirt - yes, it will cut 3” deep edges for your landscaping provided it’s a straight line cut. Wouldn’t say that’s a recommended use, but I know from experience that is does work in a pinch.

Enlarging the photo, it says it’s made in Germany & then gives a US location of Elyria, OH. The number stamped on the right side which may be a SN is: 0061001214.
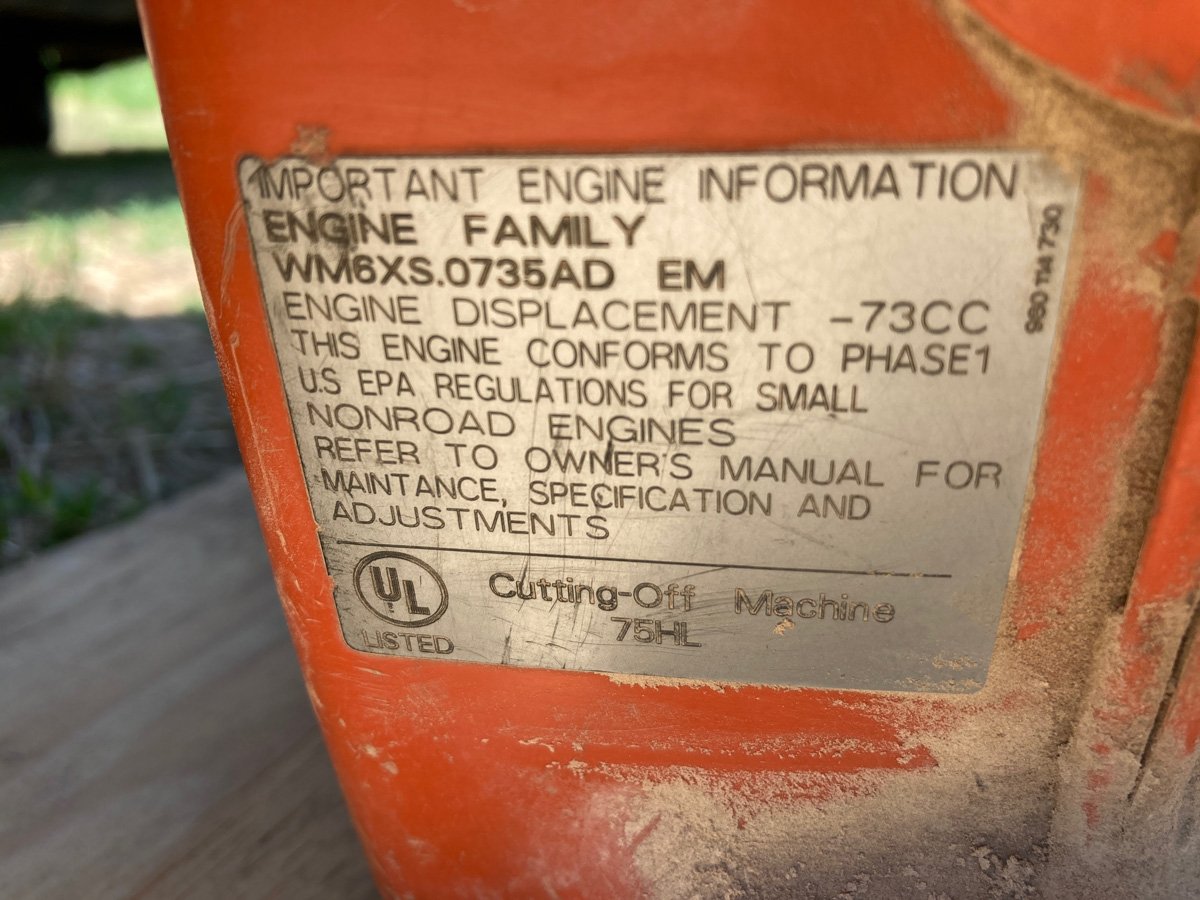
This decal provides engine information should you have need of it. The engine family is: WM8XS.0735AD. Displacement is noted as 73cc,
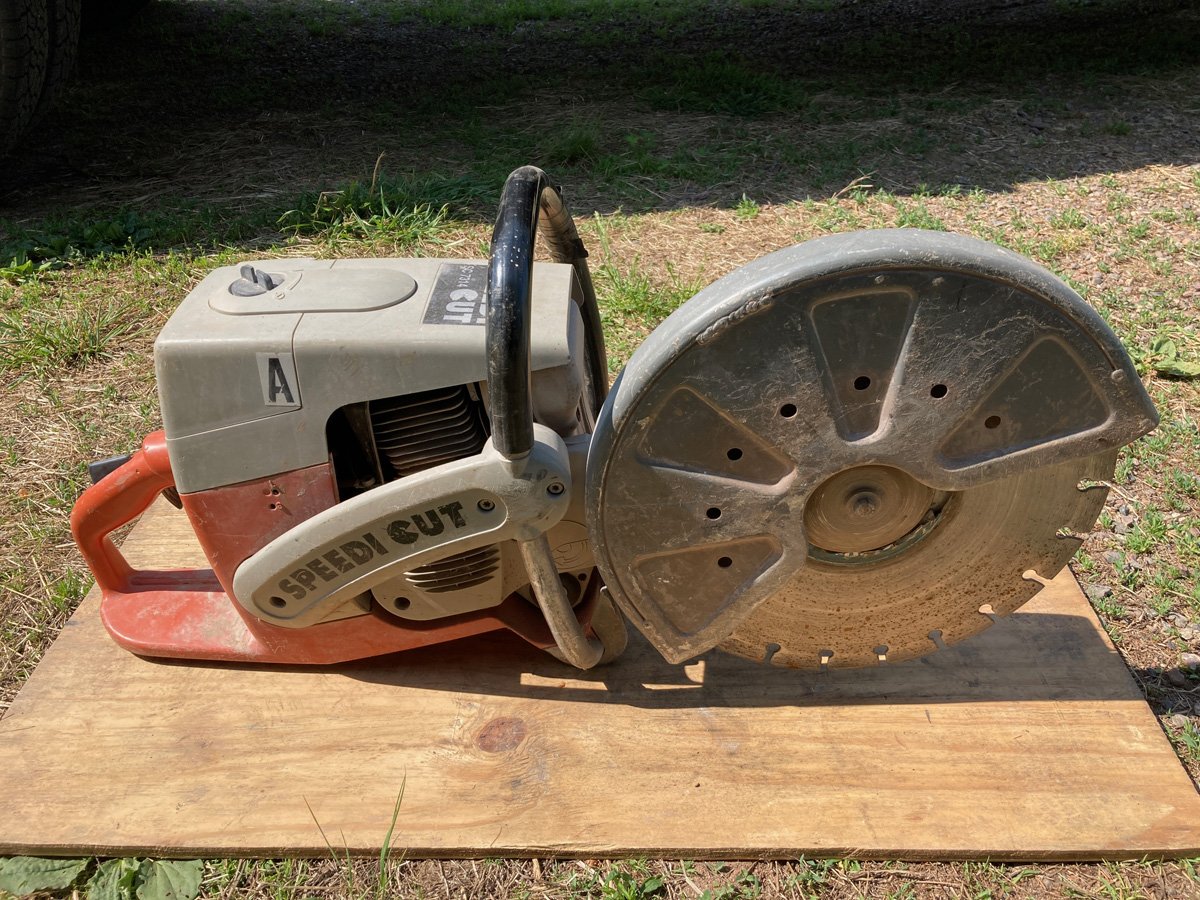
Perhaps a bit heavier saw and one lacking the wet cut option, if you use that option, yet it’s still a great saw for the money.
A handy, multi-use saw that will get the job done. That’s Speedi-Cut. When you don’t need the name or the extras, when you just want to start and saw, this Speedi-Cut is ready to work for you.
$600
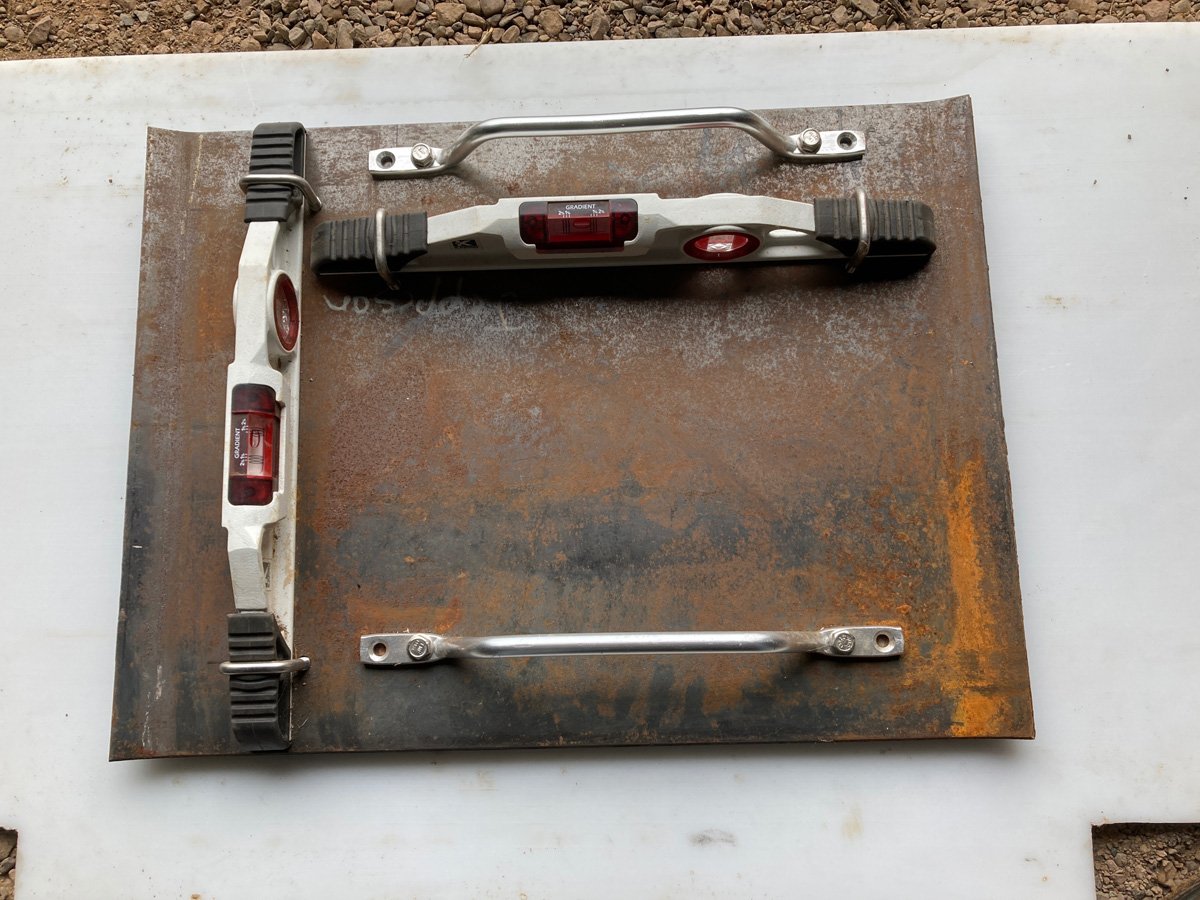
Wall Base LEveler
Original Design • One of a Kind
Tired of picking up or tipping wall blocks back so you can shuffle some sand only to rinse and repeat? The Wall Base Leveler has the potential to increase productivity and end the pick up, set down. An original design which I created, once you pass the short learning curve, you’ll find it to be a great asset to your retaining wall building projects.
Keep in mind that this Wall Base Leveler is for fine tuning, not for general leveling of your sand. Level your sand in whatever manner you currently use. In other words, bring your wall base to the same point it would be when you set your first block. Once you have your sand leveled as well as you can, you’re ready to use the Wall Base Leveler.
Step One: After you level your sand, set your first wall block, and get it level in both directions. This is important since the Wall Base Leveler will work off the height set by the first block. Once the first block is at your desired height and is level in both directions, remove that block and gently set the Wall Base Leveler where the block was setting. It will overlap the block area - which is what we want it to do.
Step Two: Using the height established by your first block as the height for your base block, look at your 2 levels on the Wall Base Leveler. Using a nylon headed mallet, preferably 2.5” in diameter so you have plenty of strike power, hold the Wall Base Leveler down and strike the plate of the Leveler in whatever area is necessary to achieve level in both directions. This will initially take a bit of practice, but your goal is to achieve level on both bubbles.

Step Three: Once the area beneath the Wall Base Leveler is level on your bubbles, carefully lift the Wall Base Leveler (don’t try to slide it) and set it forward on your wall base with about ⅓ of the Leveler overlapping the previous area. The ⅓ area gives you the area needed to match the remaining ⅔ of the Leveler that now sets on sand ahead of your last Leveler location.

Step Four: With the Leveler in the ⅓ - ⅔ position, check your bubbles, press down on the Leveler and strike the base plate (don’t hit the levels) in the necessary locations until the ⅔ area is level in both directions - which should make it level with the previous area. Now, rinse & repeat - Pick up the Leveler. Move it forward until ⅔ of the Leveler is ahead of the previous location. Strike the Leveler plate to achieve level on both bubbles.
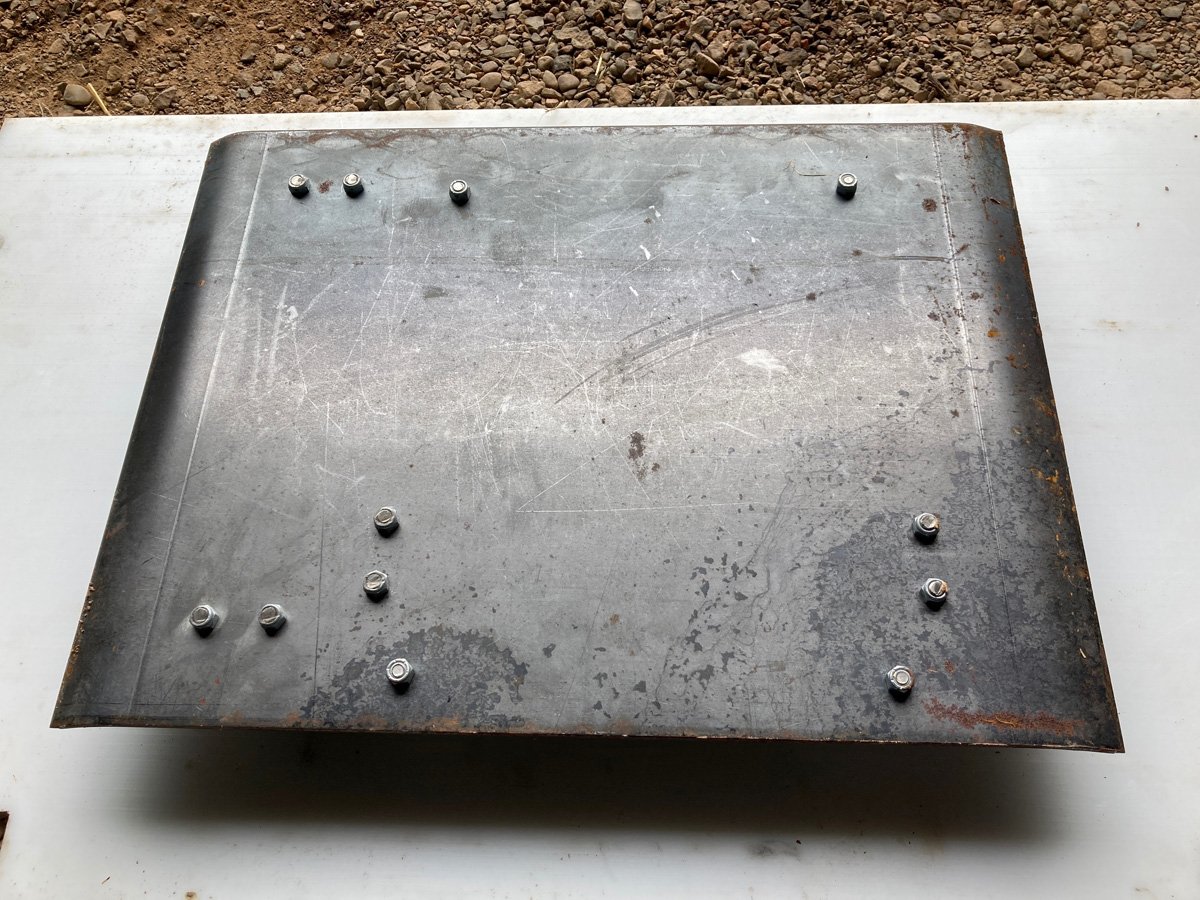
The Wall Base Leveler will improve productivity for those who are 1) particular about level in both directions; 2) get tired of picking up, moving sand, and setting the same block multiple times. After setting 83# blocks for a 54 foot wall, I found it much more efficient to use the Wall Base Leveler and then set the block only once. As you learn how to use the Leveler, you will find the need, at times, to pound a bit on your block after you set it, but those times will become less as you become more familiar with the Leveler. Suggestion: Occasionally check your wall height with a string or long level to verify that your wall isn’t creeping up or down. More practice will make this less necessary. Specs: Size: 3/8 x 16 x 22” plate; Weight - 40#; 16” Kapro levels with Optivision, impact resistant.
This is an original design. It’s not copied in any way to my knowledge. It’s the only one that exists. So, if you decide this is a great tool, you can replicate as many as you choose.